- opened the original RAW photo in Adobe CameraRaw
- added exposure, a little bit of contrast, a little desaturation, a little vibrance.
- on the third tab, i reduced the noise a little bit by increasing the “luminance” slider by 12 points.
- on the sixth tab, i added some vignetting by reducing the “amount” slider to something about -70 points.
- then opened the photo to photoshop 🙂
- duplicated the background layer with (ctrl + j). made some cleaning with the healing tool.
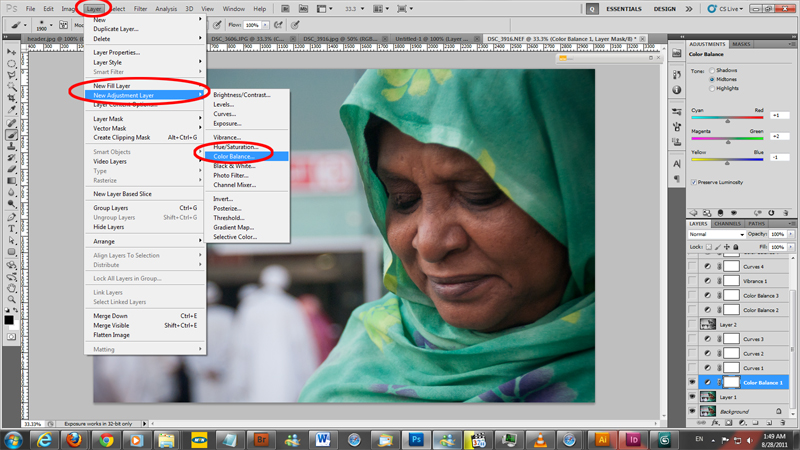
- then color enhanced the photo with “color balance” layer. > shadows= red: -2, green: 0, blue=+2.. mid-tones= red: +1, green: +2, blue: -1..

- added some light and contrast with a curve layer by making the curve an “S” shape.
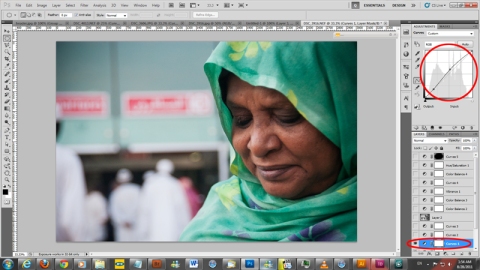
- added some more light by adding another curves layer and dragging the curve up a notch.
- added another curves layer, on the blue channel i dragged the bottom point of the curve up (made the shadows blue) and dragged the upper point of the curve down (made the highlights yellow)

- merged all the underlying layers to the top layer by (ctrl + shift + alt + E) long short-cut lol.
- changed the blending mode to softlight.
- reduced the “fill” to some 70%.
- added a color balance layer, shadows: red=+3, green=+3, blue=-6. highlights: blue= -5.
- added another color balance layer, midtones: red=-17, blue=+5. shadows: red=+2, blue=-1.
- added a vibrance layer, vibrance=+61
- added contrast by adding a curve layer, made the curve an “S” shape.
- another color balance, shadows: red=-3, blue=+1.
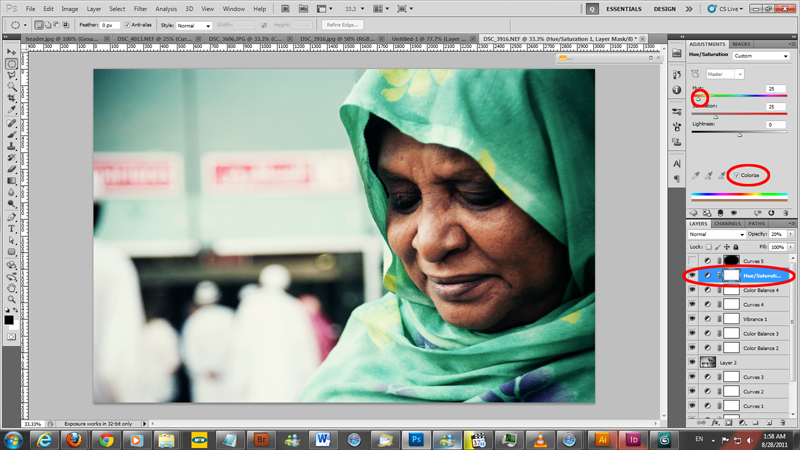
- added a hue-saturation layer, ticked the colorize check box, used an orange desaturated color.

- and finally, i added a curve layer, dragged the rgb curve down to a dark picture, the red channel dragged down for cyan color, the green channel dragged down for little magenta, the blue channel i dragged up for more blue. now you think its ruined!
- with the brush tool, relatively big brush, with hardness=0, and black in the foreground, i brushed over that dark curve layer in the middle leaving the sides to give the vignetting effect 🙂




By Qusai Akoud
hello everybody.. here i have this nice tutorial that is going to show you how to design your own wallpaper inside photoshop, my purpose is to show you a new technique and give you some inspiration, it’s pretty detailed tutorial, but if you’re missing something please leave a comment and i’ll clear things up for you.. Read the rest of this entry »
My Gallery
Posted on: August 27, 2009


 Qusai Akoud's Blog